Monday, June 30, 2008

Cupcake Hero - Melon!

Sorry I've gone missing for so long, I was visiting the lovely (humid) D.C. area - quite nice, in fact, we decided it wouldn't be bad at all to live there for a while.

Anyway. I'm in under the wire - I spent a day two weeks ago preparing the syrup I wanted to use for Cupcake Hero this month, and then ran out of time before we left. Hurray for getting them made though because they're SO dreamy!!!***

My submission for Cupcake Hero are these cute, cakes sweetened with watermelon syrup. The syrup itself is a project, but I'd have to say I would totally do it again, these are so yummers! Adapted from the white cake recipe on the back of the Softasilk box no less! Anyway - if you weren't told, I doubt you would know that the flavour is watermelon, since it's such a mild taste, but all of the flavour and some of the sweetness of this cake comes from pure watermelon syrup - and the blueberries go so well with it! Eat these warm out of the oven for the best taste/texture.


Summer Cakes
makes about 18


3 1/2 cups cake flour
1 cup sugar
1/2 cup watermelon syrup
1/2 tsp salt
1/4 tsp baking soda
1 tsp baking powder
2/3 cup milk
4 eggs
1 1/2 cups butter - unsalted
optional - dried blueberries and dye

Sift flour, baking soda, baking powder and salt together.
in separate bowl...
Cream butter and sugar 'till fluffy (i always over-cream). Add syrup and whip like the dickens. Beat in eggs one at a time. Add milk and flour mixture and beat until just mixed. add dye and blueberries and beat till mostly smooth.

Using greased or lined cupcake pans, fill cups a little more than 3/4 full.
Bake for 15-20 minutes to until pass the toothpick / press test.

Allow to cool completely before glazing if you want a thick glaze - reheat for a few seconds in the microwave before eating. Otherwise, glaze and eat *right* out of the oven!

Glaze

1 cup powdered sugar
1/2 cup watermelon syrup

combine, mix, add colouring


Watermelon Syrup

a few watermelons
a few drops of vanilla extract

remove pulp from watermelon(s). Cube, puree in blender. Strain into heavy bottom saucepan.
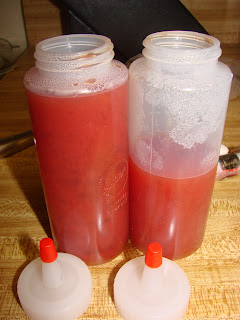
Cook juice over low heat (210 f), skimming occasionally for a few hours - until reduced to 1/8 volume, or to thickness desired.
add a drop of vanilla extract at a time, stirring and tasting until it's the taste you desire - i found the pure syrup to have an off-putting cooked melon taste that just a touch of vanilla helped. i think i used 3 drops and that was almost too much - the flavor of the watermelon is very very mild.


I used 2 of those mini watermelons and reaped something shy of 1 1/2 cups of syrup


***I typed that right after making and trying them fresh out of the oven. The next day I had another and they weren't on the level of dreamy anymore - just tasty tasty cupcakes. These cakes really are *best* super fresh.

Tuesday, June 10, 2008

Making Cream Puff Puffs

I have a friend, she knows who she is! Who has been trying to make cream puff puffs (you know, the nice crispy, hollow, light outside bready part) ever since I made that batch of lemony ones, and for whatever reason, they aren't turning out. So, I made a batch today, and took lots of pictures to walk you through it!

These things are great for lots more than just cream puffs! I used the ones I made tonight to house tuna salad. They'd be good with soup, maybe to serve a casserole serving in, or chicken and dumplings or.. mmm yummy stuff!

Recipe:
1/2 Cup Water
1/4 cup butter
1/2 cup flour
2 eggs

Preheat the oven to 400f
Combine the water and butter on the stove. bring to a boil, be sure the butter melts.

Dump in the flour, and then turn off the heat on the stove.

Stir until the dough all comes together and kinda sticks and rolls into a ball mass.

Let it sit like that for 5 minutes - no more no less, just so it cools down a bit, but is still hot.
Crack in your eggs and stir or beat the living heck out of it until you get a nice smooth dough - it'll be sticky and kinda thick.


Dollop this batter in 6 blobs onto parchment paper laid on a cookie sheet, each blob about 3 inches apart.

Check that your oven has infact reached 400f at this time.
Place in oven - set the timer for 35 minutes, and leave until you hear that beep. Do not open the oven to peek at any time* - when you come back you should have six rounded golden balls.

Pull them out of the oven and as soon as you are able, cut the tops off and allow them to cool off.

Once cooler, run a knife around the inside of the ball to loosen the soft dough inside, and pull that out.
Throw that away, or, be like me and cover it in powdered sugar and eat!

Allow to cool completely and store in an airtight plastic bag if you're not using them right away.

*unless you smell smoke or hear screams of "Help! Help!" from inside the oven.

Monday, June 9, 2008

Flourless Chocolate Cake Chili

Er.. that is... Flourless Chocolate Chili Cake! Oh how the order of words can change things!

We had a THROWDOWN* at my second life** today.
A week or so ago, Helen brought in - and had practically anyone she could find who might appreciate it try it - Chili Chocolate. A dark chocolate with a rather spicy kick. It was tasty! A few days later, I came across this recipie for Chipotle Flourless Chocolate Cake - so I sent Helen the link, planning to make it for her if she responded in a positive manner. She did - and forwarded it on to Leslie, who jumped up and said she'd make it - to which I said I was going to make it, in a huffy huff. So, we decide to have a THROWDOWN. Each making it but with our own twist - she didn't want to do Chipotle because of the smokeyness, and I wanted to do.. something, I wasn't sure. Then in comes Helen again, who insists she will make the original recipie. And there it was. The THROWDOWN was planned for today - Monday.

So, wanting of course to win, because I'm competitive as hell like that, I made a practice batch this weekend. First - I purchased three different kinds of dried chilies from the local Mexican market. They had a wall of chilies, lots of chilies.. all air-tightly packed, so my plan to purchase based on smell fell apart rather quickly. So I purchased Ancho (because everything I read about chili and chocolate talked about ancho), Puya (it looked spicy), and Cascabel (it looked different).

Taking these home, I immediately ripped into the bags, and started to chop the chilies up.


Being scientific, I decided to do a taste test. I chopped the chilies up seeds separate from flesh - since I figured the seeds would be spicy, and the flesh flavorful. I then mixed each of the 6 powders into a ganache and let them sit.

Then, Dan and i went through them all, tasting.
I tasted nothing. NOTHING! It was a waste of time! YAR! Not sure why I couldn't taste the chili at all. Wierd.
The spices by themselves offered a good idea as to whether I wanted them in chocolate, though. The Ancho was tasty, but not spicy, the Puya was spicy but had no taste, and the Cascabel was icky. So I'd use the Ancho and Puya. (The seeds, incidentally, had no flavor or spice and i threw them away)

I then decided to make the cake recipie, and split it into four small cakes. The first had 1/4 tsp Puya, and 1/2 tsp Ancho. The Second was 1/2 tsp of each. The third was 1 tsp Ancho, and the fourth was 1 tsp Puya.


I tried all of the cakes, and was fond of the all Puya cake - however, apparently after trying all of the cakes, my resistence to spice had gone up considerably, because when Dan tried it he totally freaked out about how hot it was. He liked the 1/2 and 1/2 one. So that's what I made for the final cake.


The topper was that I made an unsweetend espresso whipped cream to go with and cut down the spice for those who needed it.
The cake was awesome, if I do say so myself. It was like a non-chewy, totally fudgy, but crisp on the edges brownie. Very rich.
And it won the THROWDOWN.


*Bobby Flay was not present.
**At least that's what it feels like, I have my own coffee machine there, it's like home! (uh, work that is)

Wednesday, June 4, 2008

Mirror Mirror

Chris and Brandy came over yesterday to play! Brandy came over to see if she could help me make a decent looking mirror out of sugar. Chris came over to play with Des and spent some time playing with gum paste - she made some super pretty flowers.

The night before, I made some frames out of gum paste to pour the sugar into. The first mirror we made was poured directly on top of the tin foil. At first we thought it was great, but a few minutes later, Chris became rather fascinated with the crystallization that was occurring. Chris could be seen intently watching the sugar for the next 15 minutes or so...


We then decided to pour the sugar onto parchment paper, deciding that the crystallization (it only happened near the tin foil) was the tin foil's fault. We tinted the sugar with a little bit of violet to give it a less brassy colour. We were very thrilled with the results once we placed the pane onto tin foil after it cooled.


The final gum paste frame we had left for the night was the largest one. Unfortunately, we cooked the sugar too slowly and it started to caramelize just before it reached the required temp. We poured it anyway, but it's now living in the trash can.

Sunday, June 1, 2008

I'm in trouble

Des and I were blogsurfing just now - and I found The Tattooed Mama. As I scroll through posts we come across this one, cute photos of daddy and baby playing on the beach.. she points at the little girl in each photo "Babee!" and we get to the one of the cute little girl trying to eat her new toy cupcakes (oh my god those are cute). Des points at the girl "Babee! dat babee!" and then points over at the cupcakes "Cake! cake cake cake cake"

She's learning the important vocabulary for life!

 
Hit Counters